Mastering the Dental Microscope: Tips to Shorten the Learning Curve

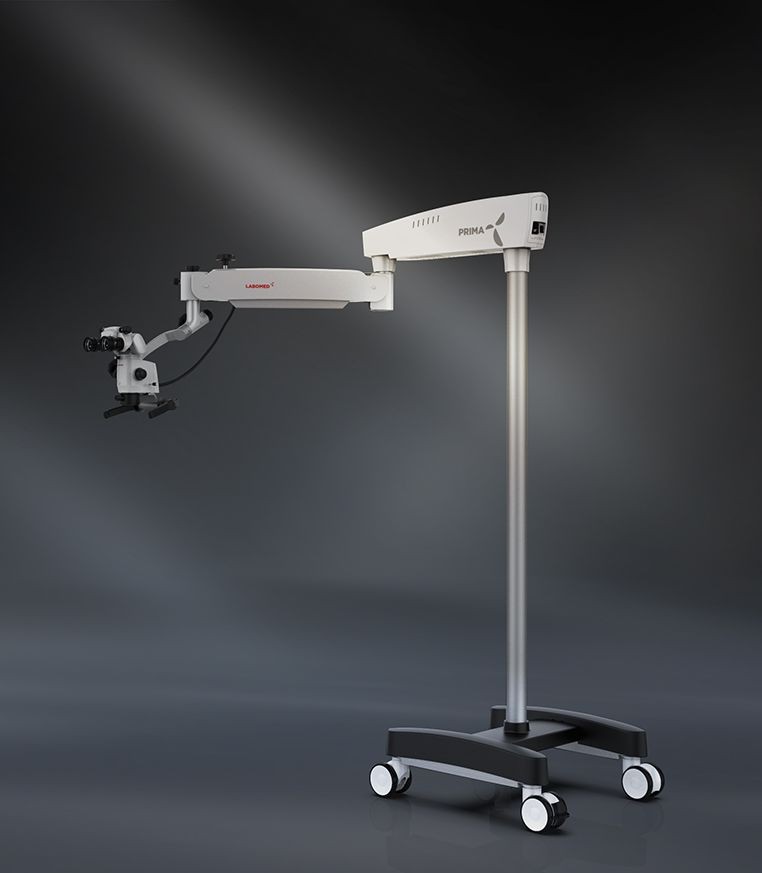
Key Takeaways
- Learning to use a dental microscope involves adapting your posture, hand-eye coordination, visual field, and clinical workflow.
- Start with familiar procedures at low magnification before progressing to more demanding cases.
- The dental assistant needs to adapt alongside the dentist, particularly to mirror positioning, instrument transfer, and chairside coordination.
- Consistent daily practice is more useful than occasional, prolonged training sessions.
- Microscope design, working distance, positioning, and mounting options can influence how easily the equipment fits into your practice.
The first few times you work through a dental microscope, a routine procedure can feel surprisingly unfamiliar. You may spend longer positioning the optics than treating the tooth. Your hands seem slightly out of sync with what you see, and the assistant has to adjust to a different way of working. A procedure that normally takes little thought suddenly demands your full attention.
This is a common part of the dental microscope learning curve. The challenge is not simply getting used to magnification. It is learning to coordinate your vision, posture, instruments, and team around a different working setup.
The good news is that you do not have to change your entire clinical routine overnight. A gradual approach, with clear milestones and regular practice, can make microscope dentistry easier to adopt without disrupting your working day.
What This Blog Covers
- The common challenges of learning to use a dental microscope.
- The fundamentals of positioning, working distance, magnification, and ergonomics.
- Techniques for improving direct and indirect vision.
- A step-by-step plan to shorten the dental microscope learning curve.
- How to train dental assistants and adapt four-handed dentistry workflows.
- Common beginner mistakes and how to correct them.
- Dental microscopes vs. loupes for general dentistry.
- Key factors to consider when choosing a dental microscope for your practice.
- When to consider formal microscope training.
How Can You Shorten the Dental Microscope Learning Curve?
The most effective way to shorten the dental microscope learning curve is to build familiarity gradually rather than trying to use the microscope for every procedure immediately. Start by getting comfortable with positioning and working distance, practise at low magnification, and introduce the microscope during familiar procedures. As your coordination improves, progress to indirect vision and more demanding clinical tasks.
Train your dental assistant alongside you, establish a consistent setup routine, and identify what causes interruptions during each session. Regular practice, appropriate equipment positioning, and targeted training can help make microscope use more comfortable and easier to integrate into daily dentistry.
What Makes the Dental Microscope Difficult to Learn?
Dentists already have established ways of positioning patients, holding instruments, and maintaining visibility. Introducing a microscope changes several of these habits at once.
The visual field becomes more restricted at higher magnification. Small hand movements may appear more pronounced, and working through indirect vision requires coordination between the mirror, the image, and the instrument. Meanwhile, the dentist must maintain a comfortable posture rather than leaning towards the patient to compensate for an unfamiliar view.
There is also a team adjustment. The assistant may need to change position, manage the mirror differently, anticipate instruments more carefully, and work around the microscope's stand.
These changes explain why purchasing a dental microscope does not automatically lead to regular use. The equipment needs to become part of a repeatable clinical routine.
The Fundamentals to Learn First
Positioning and Working Distance
A productive session begins before the procedure starts. Adjust the patient, operator's chair, microscope, and binoculars so you can maintain a comfortable, upright posture while looking through the optics.
Working distance is the distance between the microscope's objective and the treatment area at the intended focus. If that distance is not established correctly, you may find yourself moving the microscope or patient repeatedly to regain focus.
Practise setting up the same way each time. Begin with the patient in position, adjust your posture, and then bring the microscope into alignment. Once you find a comfortable setup, make small adjustments rather than rebuilding the position throughout the procedure.
Magnification and Field of View
Higher magnification reveals more detail, but it also reduces the field of view. Starting at maximum magnification can make orientation difficult, particularly when you are still learning to coordinate your hands with the image.
Begin at low magnification to locate the treatment area and understand the overall view. Increase magnification when you need to examine a specific detail, then return to a wider view when you need to reorient yourself.
This is one of the most practical dental microscope tips for beginners: use magnification deliberately rather than treating the highest setting as the default.
Ergonomic Posture
A microscope should support your working posture, not encourage you to lean forward to reach the eyepieces. Keep your head and back in a comfortable, neutral position, with your shoulders relaxed and your arms supported as appropriate.
If you repeatedly lift your shoulders, tilt your head, or shift your body to maintain the image, revisit the setup. The issue may be the patient position, chair height, binocular angle, or microscope alignment.
Good dental microscope ergonomics are not separate from clinical performance. A setup that feels comfortable is easier to maintain across a full appointment, while an awkward one can become a habit if it is never corrected.
Direct and Indirect Vision
Working through a microscope can require a different relationship between what you see and how you move your hands. When using a dental mirror, the image may not correspond intuitively to the direction in which your hand initially moves.
Practise controlled mirror movements and instrument positioning outside complex procedures. Start with a familiar treatment area and focus on keeping the image stable while making small, deliberate movements.
As this coordination improves, indirect vision becomes less of a distraction and more of a normal part of microscope dentistry.
A Step-by-Step Plan to Shorten the Learning Curve
Think of microscope adoption as a progression rather than a switch. Each stage should build on the previous one.
|
Stage |
What to practise |
Readiness check |
|
1. Setup |
Patient positioning, working distance, focus, and posture |
You can establish a comfortable view without repeated repositioning. |
|
2. Low magnification |
Orientation and basic instrument control |
You can maintain a stable field while performing familiar tasks. |
|
3. Simple procedures |
Routine, familiar clinical work |
You can complete the task without constant adjustments interrupting your workflow. |
|
4. Indirect vision |
Mirror control and hand-eye coordination |
You can maintain the image while making controlled movements. |
|
5. More complex cases |
Higher magnification and demanding visual tasks |
You can manage the setup and team workflow without compromising clinical judgement. |
These stages are a practical framework, not a clinical competency standard. Progress at a pace that suits your experience and the demands of the procedure.
Start With Low-Risk, Familiar Procedures
Choose procedures you already perform confidently and where microscope use fits naturally into the work. This allows you to concentrate on positioning, visibility, and coordination without simultaneously learning an unfamiliar clinical technique.
Do not judge the microscope's usefulness by how quickly you complete your first few cases. Initially, some tasks may take longer because setup and adjustments are still new. Track what is causing the delays and work on those specific steps.
Build Consistent Microscope Time Into the Day
Occasional use makes it harder to develop consistent habits. Plan regular opportunities to work with the microscope, even if you initially use it for only part of a suitable procedure.
Keep the equipment accessible and establish a repeatable dental microscope setup routine. If moving the microscope into position takes several minutes every time, examine whether the room layout, mounting arrangement, or equipment placement is contributing to the problem.
Increase use as your confidence grows, rather than forcing every procedure under magnification from the beginning.
Train the Dental Assistant and Four-Handed Workflow
The assistant is not simply adapting to a new piece of equipment. Their role changes as the dentist works through the microscope.
A useful chairside workflow checklist includes:
- Agree on the patient's and operator's positioning before starting.
- Arrange instruments and materials within easy reach.
- Practise mirror management without disrupting the visual field.
- Coordinate instrument transfers to minimise unnecessary movement.
- Establish how the assistant will anticipate the next step.
- Review what caused interruptions after each practice session.
This shared learning process can improve dental assistant workflow and make four-handed dentistry more predictable. It also helps the team identify practical issues, such as a stand obstructing access or instruments being positioned outside the assistant's comfortable reach.
Common Beginner Mistakes and How to Correct Them
Starting at high magnification: A narrow field can make orientation unnecessarily difficult. Begin with a wider view and increase magnification when the detail requires it.
Adjusting the microscope instead of correcting posture: Repeatedly moving the optics may indicate that the patient or operator is poorly positioned. Reset the ergonomics before continuing.
Trying to use the microscope for every procedure immediately: Rapid adoption is not the same as effective adoption. Build confidence through appropriate cases and expand usage gradually.
Treating the assistant as an afterthought: Uncoordinated instrument transfers and mirror movements can interrupt the procedure. Practise the workflow together.
Giving up because treatment initially takes longer: Early delays often come from setup and unfamiliarity. Identify the bottleneck, practise it, and reassess rather than assuming the equipment is unsuitable.
Dental Microscope vs. Loupes
Loupes and dental microscopes both provide magnification, but they differ in setup and working style. Loupes are generally more portable and may feel more familiar to clinicians already accustomed to them. A microscope provides adjustable magnification and integrated illumination, with a stationary optical system that requires deliberate positioning.
Neither option is automatically better for every dentist or procedure. The decision depends on clinical needs, visualisation requirements, ergonomic preferences, budget, and how the equipment will fit into the practice.
For general dentistry, consider which procedures would benefit from enhanced visualisation and whether the microscope can be integrated without making routine appointments unnecessarily cumbersome.
Choosing a Dental Microscope for Your Practice
The best dental microscope is not necessarily the model with the highest magnification or the most features. It is the one that fits the clinical work, operator, assistant, and physical layout of the practice.
Evaluate these factors before purchasing:
- Positioning and working distance: Can you establish a comfortable posture across the procedures you commonly perform?
- Magnification control: Can you move between a wider field and detailed inspection efficiently?
- Ergonomics: Do the binoculars and available adjustments support your preferred working position?
- Mounting options: Will a floor stand, wall mount, or ceiling mount work with the room layout and assistant access?
- Clinical integration: Can the microscope remain accessible without obstructing other equipment or disrupting patient flow?
- Documentation: If photography or video is important to your practice, review the available imaging and recording options.
Cost should be assessed alongside the configuration, accessories, installation, training, and ongoing support required. The dental microscope cost varies by model and setup, so request a detailed quotation based on your requirements rather than comparing headline prices alone.
Explore Labo America's dental microscope range to review available options for your practice.
When Should You Consider Formal Microscope Training?
Consider formal dental microscope training if positioning remains inconsistent, indirect vision is difficult, or the microscope continues to disrupt your workflow despite regular practice.
Hands-on instruction can help identify problems that are difficult to notice yourself, particularly around ergonomics, focus, and coordination with the assistant. Observing an experienced microscope user can also demonstrate how the equipment is positioned and adjusted during real clinical work.
Training is worth considering before purchasing as well as after installation. It can help you understand the practical requirements of microscope dentistry and make a more informed decision about the configuration that suits your practice.
If you are searching for dental microscope training near me, look for hands-on programmes led by experienced instructors, with opportunities to practise positioning, magnification control, indirect vision, and team coordination.
FAQs
Q. How long does it take to learn to use a dental microscope?
A. Basic familiarity may develop within weeks of regular use, but consistent speed and proficiency can take several months. The timeline depends on training, previous experience, and how often you use the microscope.
Q. What magnification should a beginner use with a dental microscope?
A. Start at low magnification to establish orientation and a comfortable field of view. Increase magnification when greater detail is needed, then return to a wider view when you need to reorient yourself.
Q. How can I improve ergonomics when using a dental microscope?
A. Adjust the patient, chair, binoculars, and microscope so you can work with a comfortable, upright posture. If you need to lean forward or repeatedly reposition the optics, review the setup.
Q. Does a dental assistant need separate training for microscope dentistry?
A. The assistant benefits from learning mirror management, instrument transfer, positioning, and how to anticipate the dentist's needs under magnification. Training together can make the workflow more consistent.
Q. Is a dental microscope better than loupes for general dentistry?
A. It depends on the procedures, visualisation needs, ergonomics, and budget. Microscopes offer adjustable magnification and integrated illumination, while loupes offer portability and a more familiar setup for many dentists.
Q. How much does dental microscope training cost?
A. Costs vary by instructor, programme length, location, and whether the course includes hands-on practice. Contact training providers directly for current fees and confirm what the programme covers.
Explore Labo America's dental microscope range to review available systems and consider which configuration aligns with your clinical workflow.
Conclusion
Getting comfortable with a dental microscope is less about mastering every control at once and more about building habits that become second nature. Start with setup and low magnification, practise familiar procedures, involve your assistant early, and move towards more demanding work when the fundamentals feel consistent.
A shorter dental microscope learning curve does not mean rushing the process. It means identifying what is slowing you down, practising those skills deliberately, and choosing equipment that supports the way you work. With regular use and a coordinated team, microscope dentistry can become a more natural part of everyday clinical practice.

© 2010-2026 Labo America, Inc. All Rights Reserved.